 home coil info products ordering
Lake Buster Tutorial
This is a good item to put in lakes, ponds, and any other water that never moves very fast. I used to call these orgonov cocktails.
They are designed to use little or even no orgonite, so they are cost-effective for those in lands where resin is very expensive. It is a way to stretch small amounts of orgonite.
I start with a bottle. It can be glass or plastic, of most any shape or size, as long as it has a smooth area to do the wrapping on. It can have a lid or not. If it does not have a lid, it will need to be completely filled with water before tossing, or it will float. This is no good for flinging off bridges on the fly. It is useful for stuffing in your backpack before strolling around a park where you might be able to discreetly fill them at the water's edge and toss. And even then, the occasional problem may arise because too much water slung out while in flight. Generally speaking, it is safer to have a lid.
If it does have a lid, steel is least ideal, as it will eventually rust out from the inside, even if you cover the outside. Most ideal for a lid is aluminum (some type of mineral waters have these) or plastic. Even cork will work, but it is not always easy to stuff the cork in very well once filled with water.
One little detail: if you do use a lid, especially a non-steel lid, which is likely to outlast the external wrap, you might as well make it so it will continue to hold energy even after the pictures rot away, which I think should take a few years if the unit is made correctly. The Chartres labyrinth appears to make water that keeps a long time, perhaps indefinitely, even after the labyrinth is removed. So use at least one of those. The torus pic makes stronger water than the Chartres one, but it loses power rapidly once the torus pic is removed. As does water made from some other labyrinth pics.
So, if you want water that will keep after the pic degrades, use Chartres, and use only distilled water (the cheap stuff from the grocery store is fine) and put some copper in it (more on this below).
 The orgonite glued on the bottom is really not required. You will get very good results even without it. But it is good to have. This piece was made in an ice-cube tray. Muffin units are good, too. It is glued on any time. Silicone glue is what I prefer, but should be allowed to cure at least several days, probably a couple weeks would be better, as it takes a while for oxygen to work its way into the center of the bond and cure it.
When in more of a hurry, I use a contact-cement type of adhesive like Welder (WalMart item). Be sure to follow the instructions on such adhesives.
Alternatively, I have also put orgonite pieces loose inside of sealed bottles.
Drawing symbols on the container: this is not required, but I do it because it adds extra power. You will ideally have a silver-colored metallic Sharpie marker of this type:
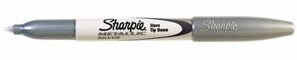 These are available in the US at Wart-Mall or, at a higher price, Office Depot or Staples. I believe they have aluminum powder in them, and they mark real well on glass. Metallic ink is energetically a bit better than non-metallic. At one time I found a selection of metallic Sharpies at a Staples store. The copper one was best of all. But when I went back there months later, they were no longer in stock. I suspect they are no longer made.
The first thing (even before glueing on any orgonite) is to mark symbols on the glass, mirror-image-wise. See OTB 9 for more on this. I usually draw the reverse Reiki symbol on the base, and more on the sides. But only on the parts of the sides that will later be covered by tape. Also I draw it on orgonite, but then I'm nuts. Exposed ink tends to rub off some when handling. Also I may draw a reversed OM symbol or 2, GOD FORCE maybe, on larger-diameter bottles.
Attaching graphics: this is not optional. The graphics are what mainly charge the water. See OTB 12. You can skip this step only if you fill the bottle with another stable charged water, such as properly-made second-generation Sally Water, and seal it. In which case you can skip all this stuff. Indeed, there seems to be an incompatibility between Sally Water and the Chartres energy.
For that matter, I have a gallon jug with Chartres labyrinths taped to it, facing in, that I use to make charged water. Put something copper in it, maybe a bit of orgonite, and distilled water, wait a few minutes (I wait longer for good measure) and you have something at least comparable in potency to Sally Water. I save up plastic drink bottles and fill them with this brew for a very quick and still very effective piece of water ammo. I use these liberally. Frankly, this is all you need, and it is much easier than layering on individual bottles. The advantage of doing it the hard way is that the torus pics are much stronger, and make much stronger water. But this water must be constantly maintained by a pic. Also, if the body of water ever lost its charge due to a big EMP or something (I don't know if that's even possible) if there are graphics in the devices, they will instantly go to work recharging the water.
Also it is very good to add the "magic rock" frequency (OTB 14) to the water. For best results one can put a crystal in the bottle, or use orgonite that contains such a crystal.
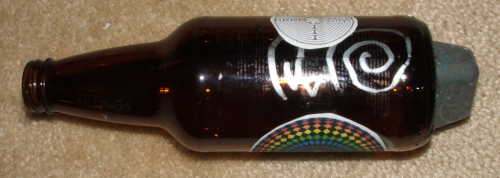
I prefer the color torus and the Chartres labyrinth, printed on both sides. On the labyrinth, I print one side with a horizontally-flipped version of the pic. This causes energy to be directed more out the face of the normal side, which I place inward on the bottle. Important: These shown graphics are printed on both sides. The primary objective is to drive energy into the bottle, so if you are just printing off one side, face it inward.
Shri yantras are also good, as are other labyrinth pics.
I use small graphics, as I will need to cover them well to waterproof them.
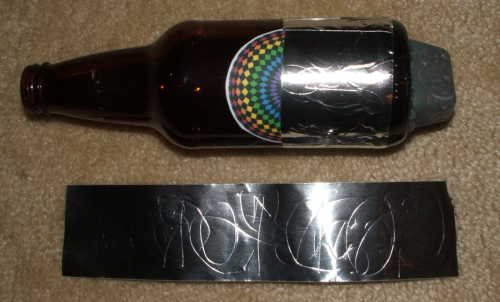 Then I cut 2 pieces of aluminum tape, available at hardware stores. (If the graphics are small enough, you can cover them with just one piece of tape. Here I am using a larger pic requiring 2 pieces of tape.) For a bit of extra power, I write/draw on these mirror-image-wise. This is optional. Rub tape in place with an inanimate object so you don't absorb aluminum.
I used to leave them as done once I covered the pics with aluminum tape, but lately I have been adding a couple other steps:
 I draw a bit more on the tape with a colored marker. This, too, is optional.
Note that I have drawn on the ice cube, too.
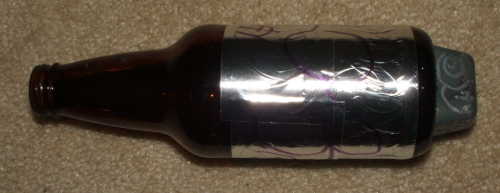
 Then I cover the aluminum tape with duct tape. Duct tape comes in different grades, and it is probably good to use a better grade. I used white tape here (better duct tape sometimes comes in different colors) as it seemed to have better energy, which I suspect is due to titanium dioxide pigment, but ordinary metallic grey tape is fine, too.
Here I drew on the tape with markers, but often I don't. It adds to the initial power jolt the unit will provide, and I would guess the ink might last a few months. One can mark with several colors overlapping each other, which may have some camouflage value as well. The exposed ink will rub off some if you handle the unit much.
If the bottle has a lid, be sure to toss it in deep water where it won't freeze and burst. Or use a glass bottle (for weight) and leave an air space for expansion. I would guess at least 10%, probably more, but test to make sure it doesn't float.
These units are too light for rivers. There I use heavy orgonite units, often with pipe(s) sticking out, so they will stay put and not wash up on shore when there's a flood.
OK, OK, I'll confess I sometimes do put these in faster-moving water, but then I make them out of large, heavy glass bottles and also throw in more reliably permanent river-busters.
If no orgonite is glued to the bottom, one can also tape another pic to the bottom and cover it in a similar manner. This makes it feel much more powerful. If one were to also put orgonite inside the bottle, even small pieces of good orgonite make quite a difference.
There are other power-ups I often add to these. I place one or more of the following inside the bottle:a piece of copper foil as described in OTB 9a small cat coila piece of aluminum honeycomb.
All 3 together makes for some wild water energy. If there is no lid on the bottle, any such items should be of a size to barely fit through the neck snugly, so they will stay in.
One truly wild thing to do is to put 3 of these completed units of the same type of bottle together into a "trinity" formation. I have made and deployed one of these. One of the most powerful things I have made yet! It had lidless bottles like in the above pics. Of course, I had the other accessories inside the bottles, and an ice cube unit on each.
Do put markings on the outside tape, then take a piece of single-strand wire long enough to fit around all 3 bottles, and twist the ends to tighten. Before it is fully tight, make sure the bottles are arranged right. Align the ice cubes to each other if applicable. So they form a neat triangle. Tighten. The purpose for the wire is to make it less awkward to tape over! The wire holds everything in place. Improves the energy a little, too. Cover with more aluminum tape as above, and another layer of duct tape.
When I tossed it in the water, I was still a bit new at this, and discovered it didn't sink. I had a lot of work invested in it, and finally out of desperation started throwing rocks at it. This caused little waves to form, and the 3-bottle unit started rocking. One bottle rocked down and scooped up some water from a wave, and eventually that one bottle sank and pulled the others in. Whew! That lake is intense now.
Update May, 2005: Be sure to read my bulletin on Advanced Power Graphics before you make these things.
Also, although I have not yet tested it, I think a trinity-style lakebuster would work well as a drought-buster, if the bottles had caps and were maybe 70% filled with water, and the unit were buried in a good spot. I would use more than one, and/or make it with large bottles as necessary to get the results. In a relatively virgin area with no big underground bases around, one made with 12-oz bottles might get significant results by itself.
My experience is that droughts are easy to bust using a combination of highly-energized, high-frequency water, and orgonite. However you do that. Gift any nearby rivers and lakes first. If your waterways are already well-gifted with such things, and you are getting a drought again, it's time to try burial.
Avoid steel caps, as they will eventually corrode.
Update Aug. 21, '07: I wrote the above in early 2004. Somewhere prior to that time, I had made up a couple of these with flimsy plastic bottles, without duct tape, just aluminum tape over the paper, and put them in a big outdoor plastic tub sold at a feed store as a livestock drinking trough. How long does that hold up? The device, I mean, not the tub. The water in the tub, being above-ground, froze much more readily than in a lake, and also got much hotter in the summer. Yet it wasn't until this summer that the aluminum tape started falling off. So that's 3.5 years or so, and I imagine probably at least 5 in a deep lake. I do not know how much longevity duct tape would have added.
Loohan